How To Lay Engineered Wood Floors
Learn how to prepare and install engineered wood flooring in our step-by-step guide.
Project details
Skill
3 out of 5 Moderate The flooring pieces are lightweight and easy to cut and install, but working on your knees can be taxing, especially with an injury.
Cost
$4.50–$16 per square foot
Estimated Time
Three days for flooring to acclimate, one day for installation
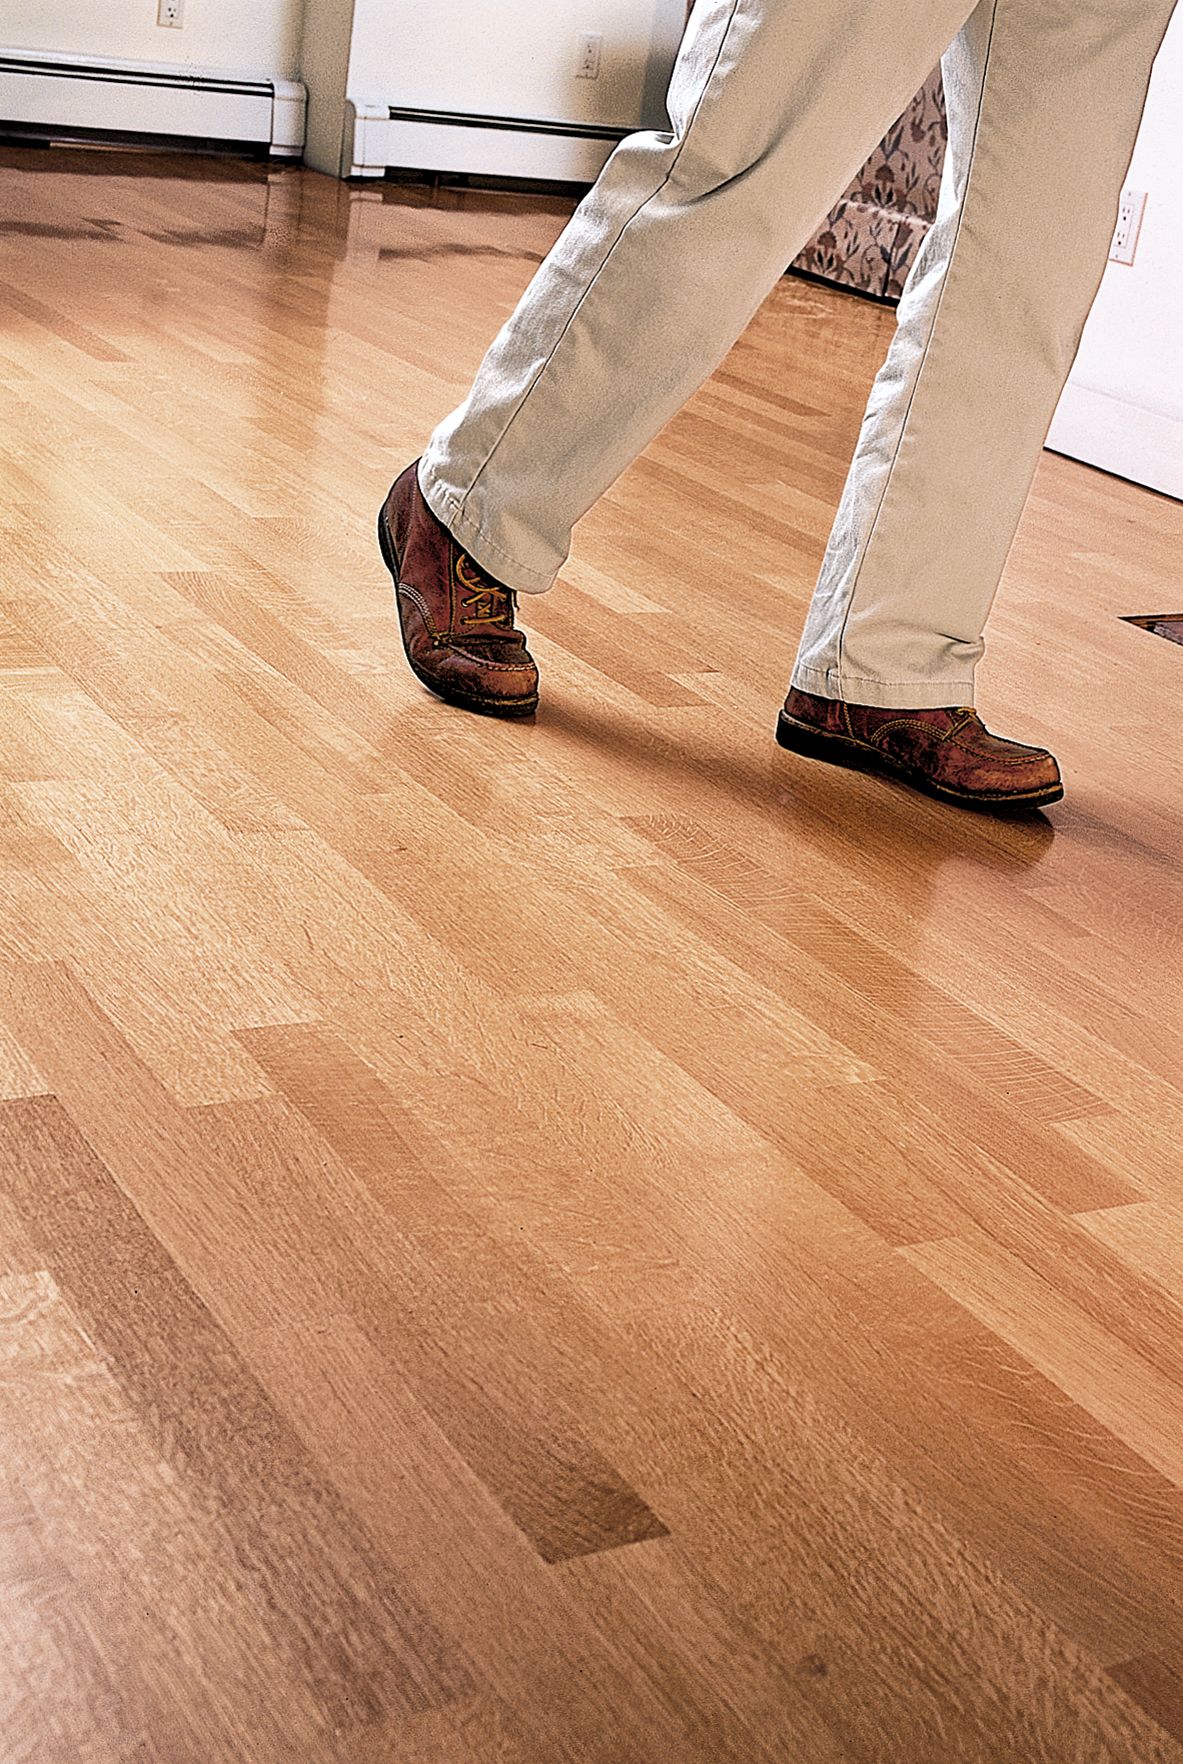
Engineered wood flooring is a durable and often cheaper alternative to solid hardwood. Its construction provides greater stability than solid wood, making it less susceptible to warping or expansion due to temperature and humidity changes. The top layer, which can vary in thickness, is made from desirable wood species such as oak, maple, or walnut, giving the flooring the same beautiful appearance as solid hardwood.
We consulted Jeff Hosking, flooring consultant for This Old House, on how to approach installation. Below, we use his tips to walk through laying down engineered wood floors in your own home, including the necessary tools, what to check ahead of time, different installation techniques, and common issues.
Benefits of Engineered Wood Floors
Engineered wood floors offer several advantages over solid hardwood, such as the following:
- Affordability: While prices can vary, engineered wood flooring often costs less than solid hardwood, especially for exotic wood species.
- Durability: High-quality engineered wood floors can last decades with proper care and maintenance.
- Installation ease: Many engineered wood products feature click-lock or tongue-and-groove systems that simplify the installation process for do-it-yourselfers (DIYers).
- Stability: The layered construction resists warping and buckling, making it suitable for installation in areas where solid wood might be problematic, such as basements or over-radiant heating systems.
- Versatility: Engineered wood can be installed using various methods, such as floating, glue-down, or nail-down techniques, providing flexibility for different subfloors and installation preferences.
Engineered Wood Floors Overview
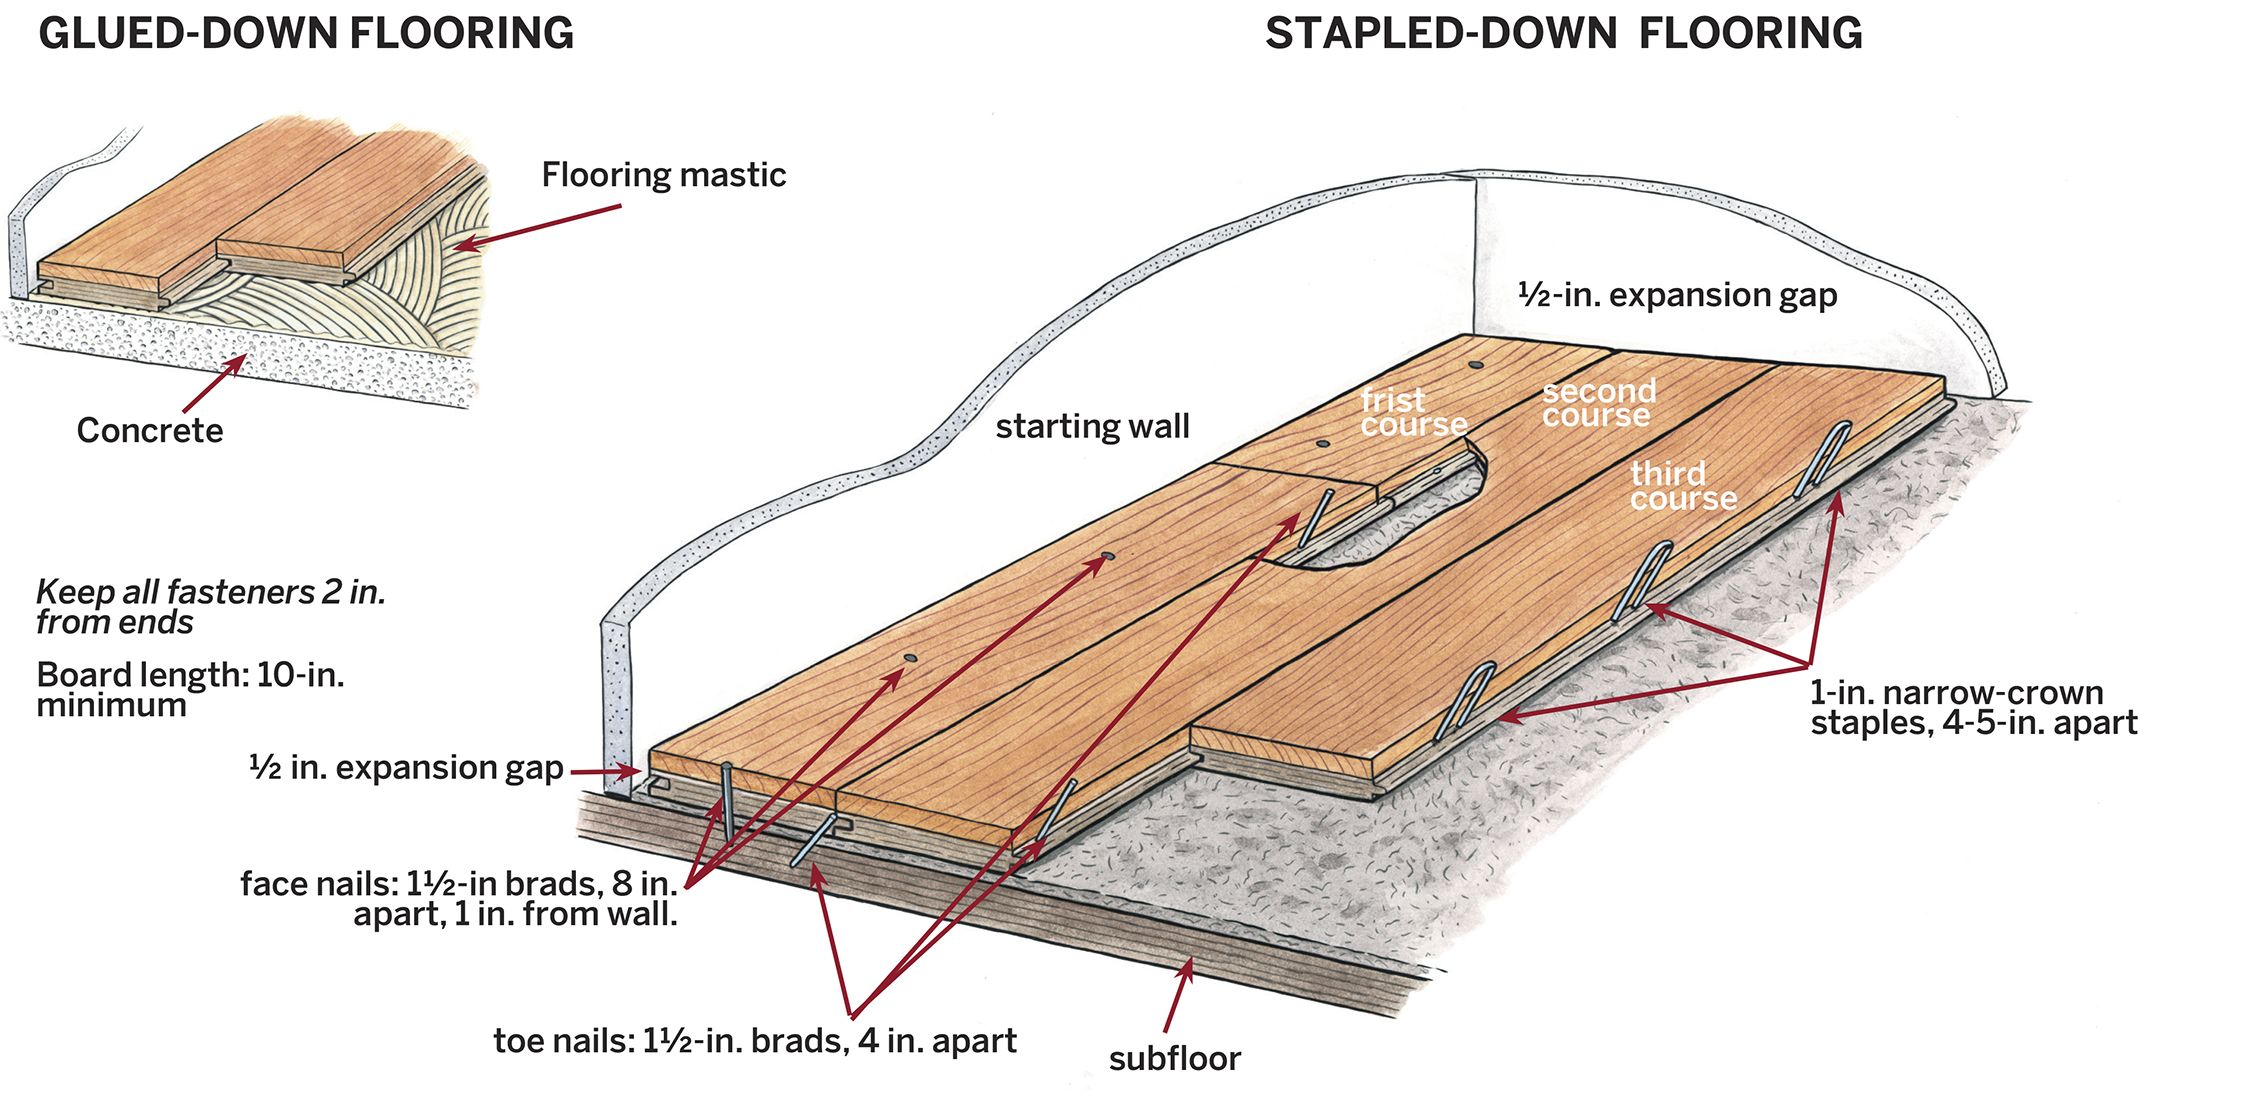
See the details and parts of an engineered wood floor installation in the illustration below.
Preparing for Installation
The preparation phase includes acclimating the flooring to your home’s environment and ensuring the subfloor is clean, dry, and level.
Gathering Your Tools
Before beginning the project, gather all necessary tools and materials to prevent setbacks.
Essential Tools
- Chalk line
- Circular saw or table saw
- Hammer
- Jigsaw (for cutting around obstacles)
- Knee pads
- Miter saw (for cutting trim pieces)
- Pencil
- Pry bar
- Pull bar
- Safety glasses and dust mask
- Spacers (1/2-inch thick)
- Tape measure
- Tapping block
- Utility knife
Required Materials
- Engineered wood flooring*
- Underlayment (if required for your installation method)
- Vapor barrier (for concrete subfloors)
- Flooring adhesive (for glue-down installations)
- Flooring nails or staples (for nail-down installations)
- Transition strips and moldings
- Wood putty (to match flooring color)
*To estimate how much flooring to buy, calculate the square footage and add a waste allowance: 5%–7% for straight-course floors and 15% for a herringbone. For metric materials, 1 square meter equals about 10.5 square feet.
Acclimating the Flooring
Acclimation prevents issues such as gaps or buckling after installation. Bring the flooring into the room where you plan to install it. Open the boxes and let the planks sit for three days while maintaining normal temperature and humidity levels in the room. Don’t store the planks in basements, garages, or anywhere it might absorb moisture.
Assessing and Preparing the Subfloor
You need a clean, dry, and level subfloor for a successful installation. Follow these steps to prepare your subfloor:
- Gently remove existing baseboards and trim with a pry bar. Also remove the end caps on baseboard heaters, registers for forced-air vents, plates for floor receptacles, and any other obstructions. Add a box extender to the floor receptacles, as code requires.
- Wall every inch of the floor and check for squeaks and loose areas in the existing floor, securing them with screws or nails. Wherever the existing wood flooring is loose, batten it down with ring-shank nails or Phillips-head screws, and set them flush. Fasteners should penetrate at least 3/4-inch into the floor framing.
- Repair loose or damaged sheet flooring. Over badly damaged floors, glue and fasten sheets of AC-grade 1/4-inch plywood, with the A side facing up.
- Check for flatness by running a 10-foot straightedge across the floor. Level any uneven areas greater than 1/8 inch.
- For concrete subfloors, conduct a moisture test and apply a vapor barrier if necessary.
Choosing Your Installation Method for Engineer Wood Floors
You can install engineered wood using three primary methods: floating, glue-down, or nail-down. Consider factors such as your subfloor type, the specific engineered wood product you’ve chosen, and your DIY experience level when selecting an installation method.
Floating Installation
Floating installation is usually the easiest method to do on your own. In this method, the planks are not attached to the subfloor but instead connect to each other, creating a single “floating” unit.
Pros:
- Allows for some natural expansion and contraction
- Can be installed over various subfloors, including concrete
- Is easiest for DIY installation
Cons:
- May feel slightly less solid underfoot compared to glued or nailed installations
- Isn’t suitable for all engineered wood products (check manufacturer recommendations)
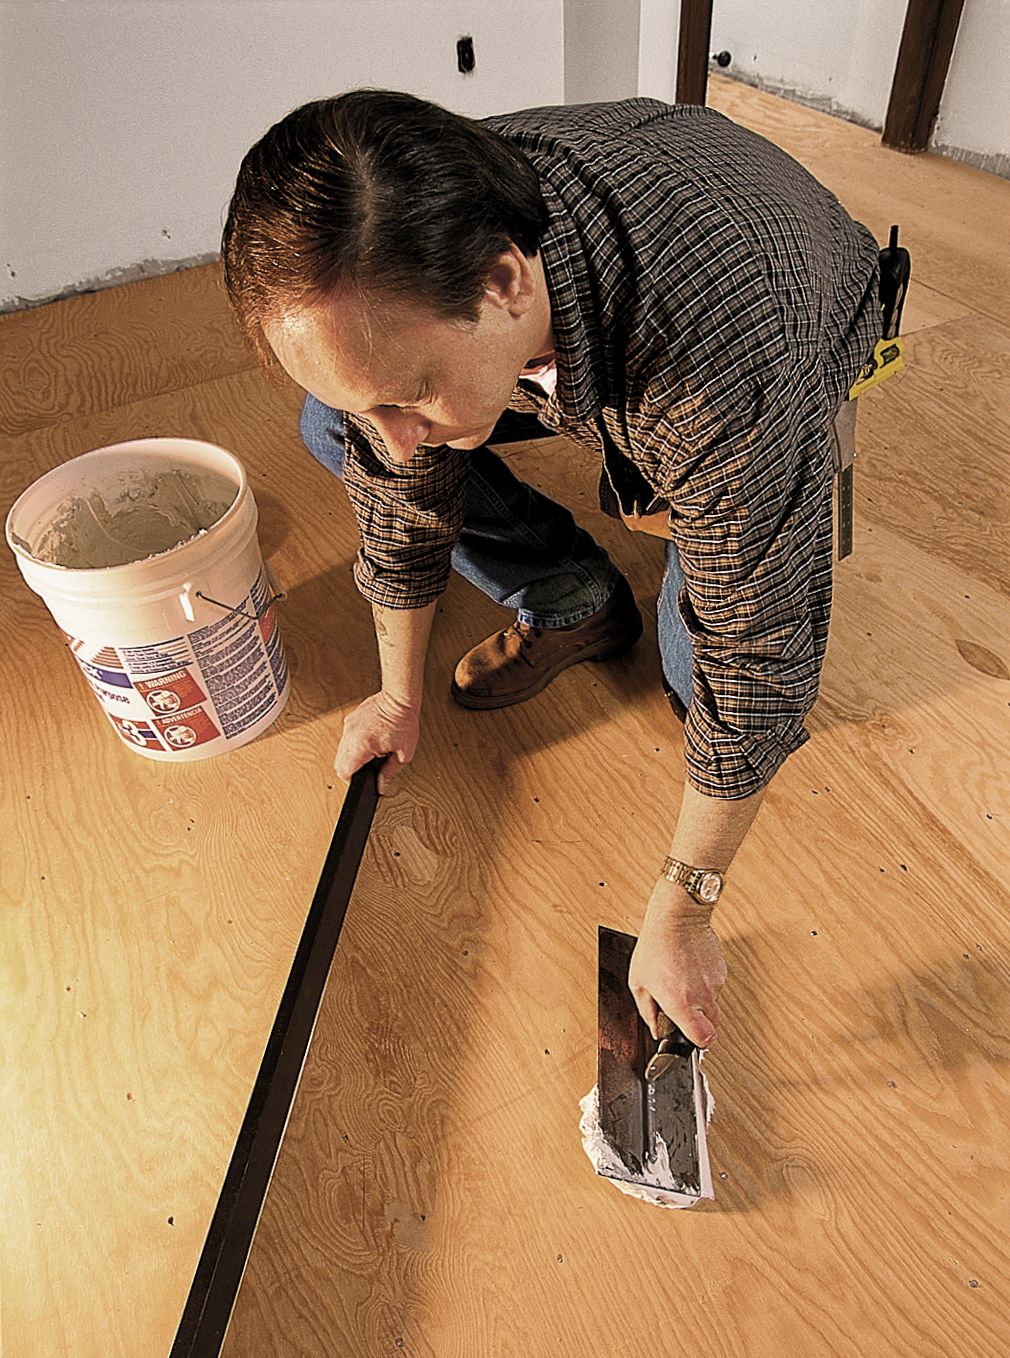
Glue-Down Method
The glue-down method involves adhering the engineered wood planks directly to the subfloor using a special flooring adhesive.
Pros:
- Gives you a highly stable floor
- Is ideal for installations over concrete or radiant heating systems
- Reduces noise and provides a solid feel underfoot
Cons:
- Is more challenging and time-consuming than floating installation
- May require professional installation for best results
- Requires careful planning because repositioning planks is difficult once the adhesive sets
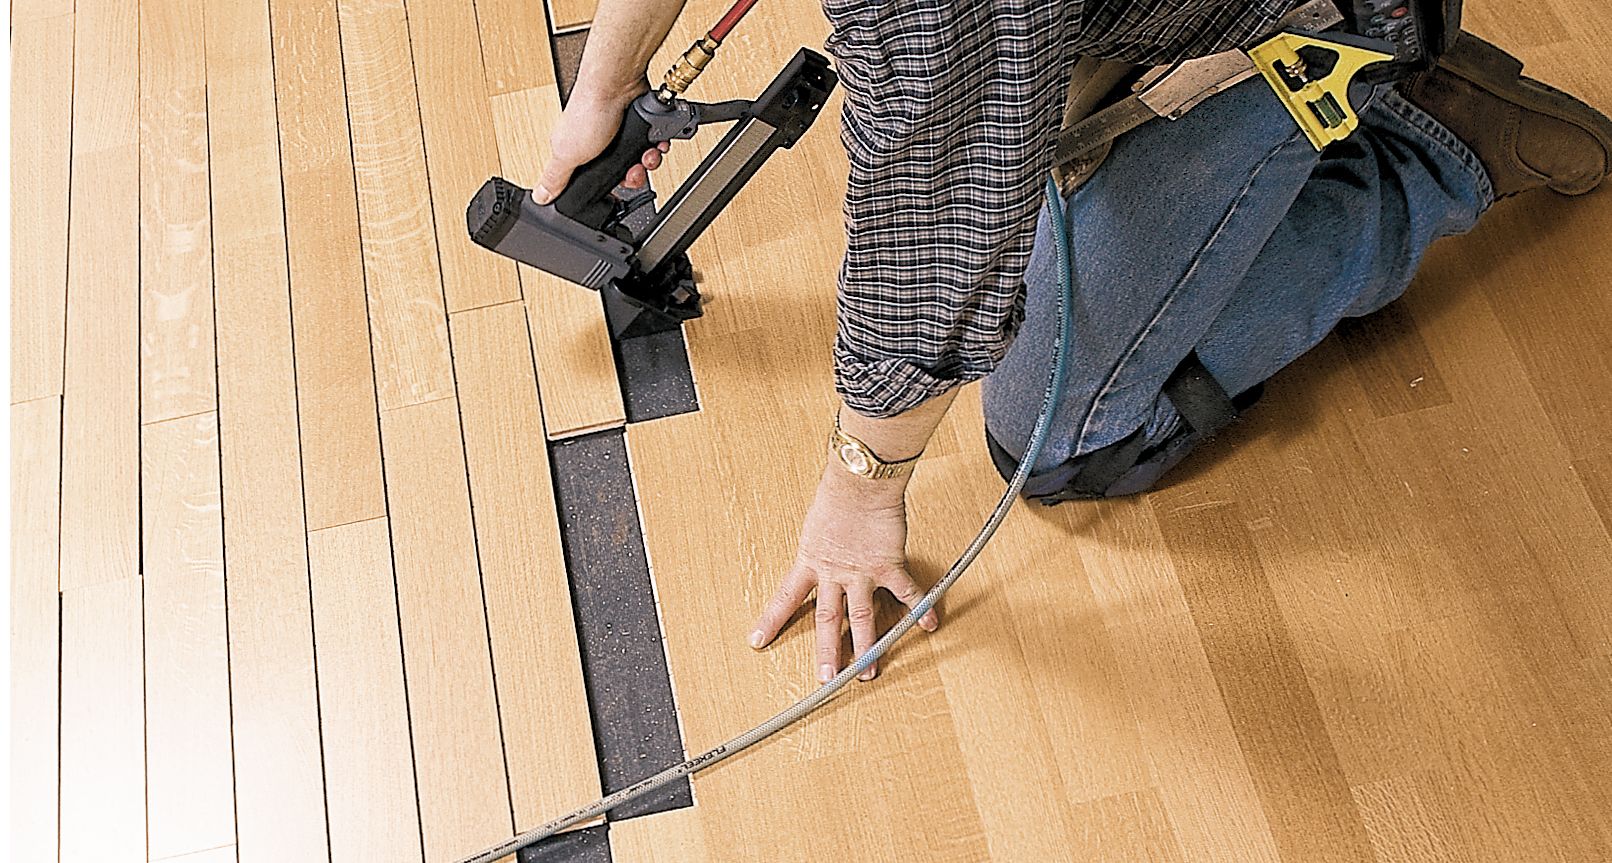
Nail-Down Technique
The nail-down method is similar to traditional hardwood installation, where planks are nailed or stapled to a wood subfloor.
Pros:
- Allows for easy repairs or board replacement if needed
- Is highly secure
- Manageable for those with hardwood installation experience
Cons:
- Is only suitable for wood subfloors
- May not be suitable for thinner engineered wood products
- Requires specialized tools such as a flooring nailer
Step-by-Step Engineered Wood Floors Installation Guide
Our step-by-step guide walks you through how to lay your engineered wood planks using the floating installation method, which is most common for DIY projects.
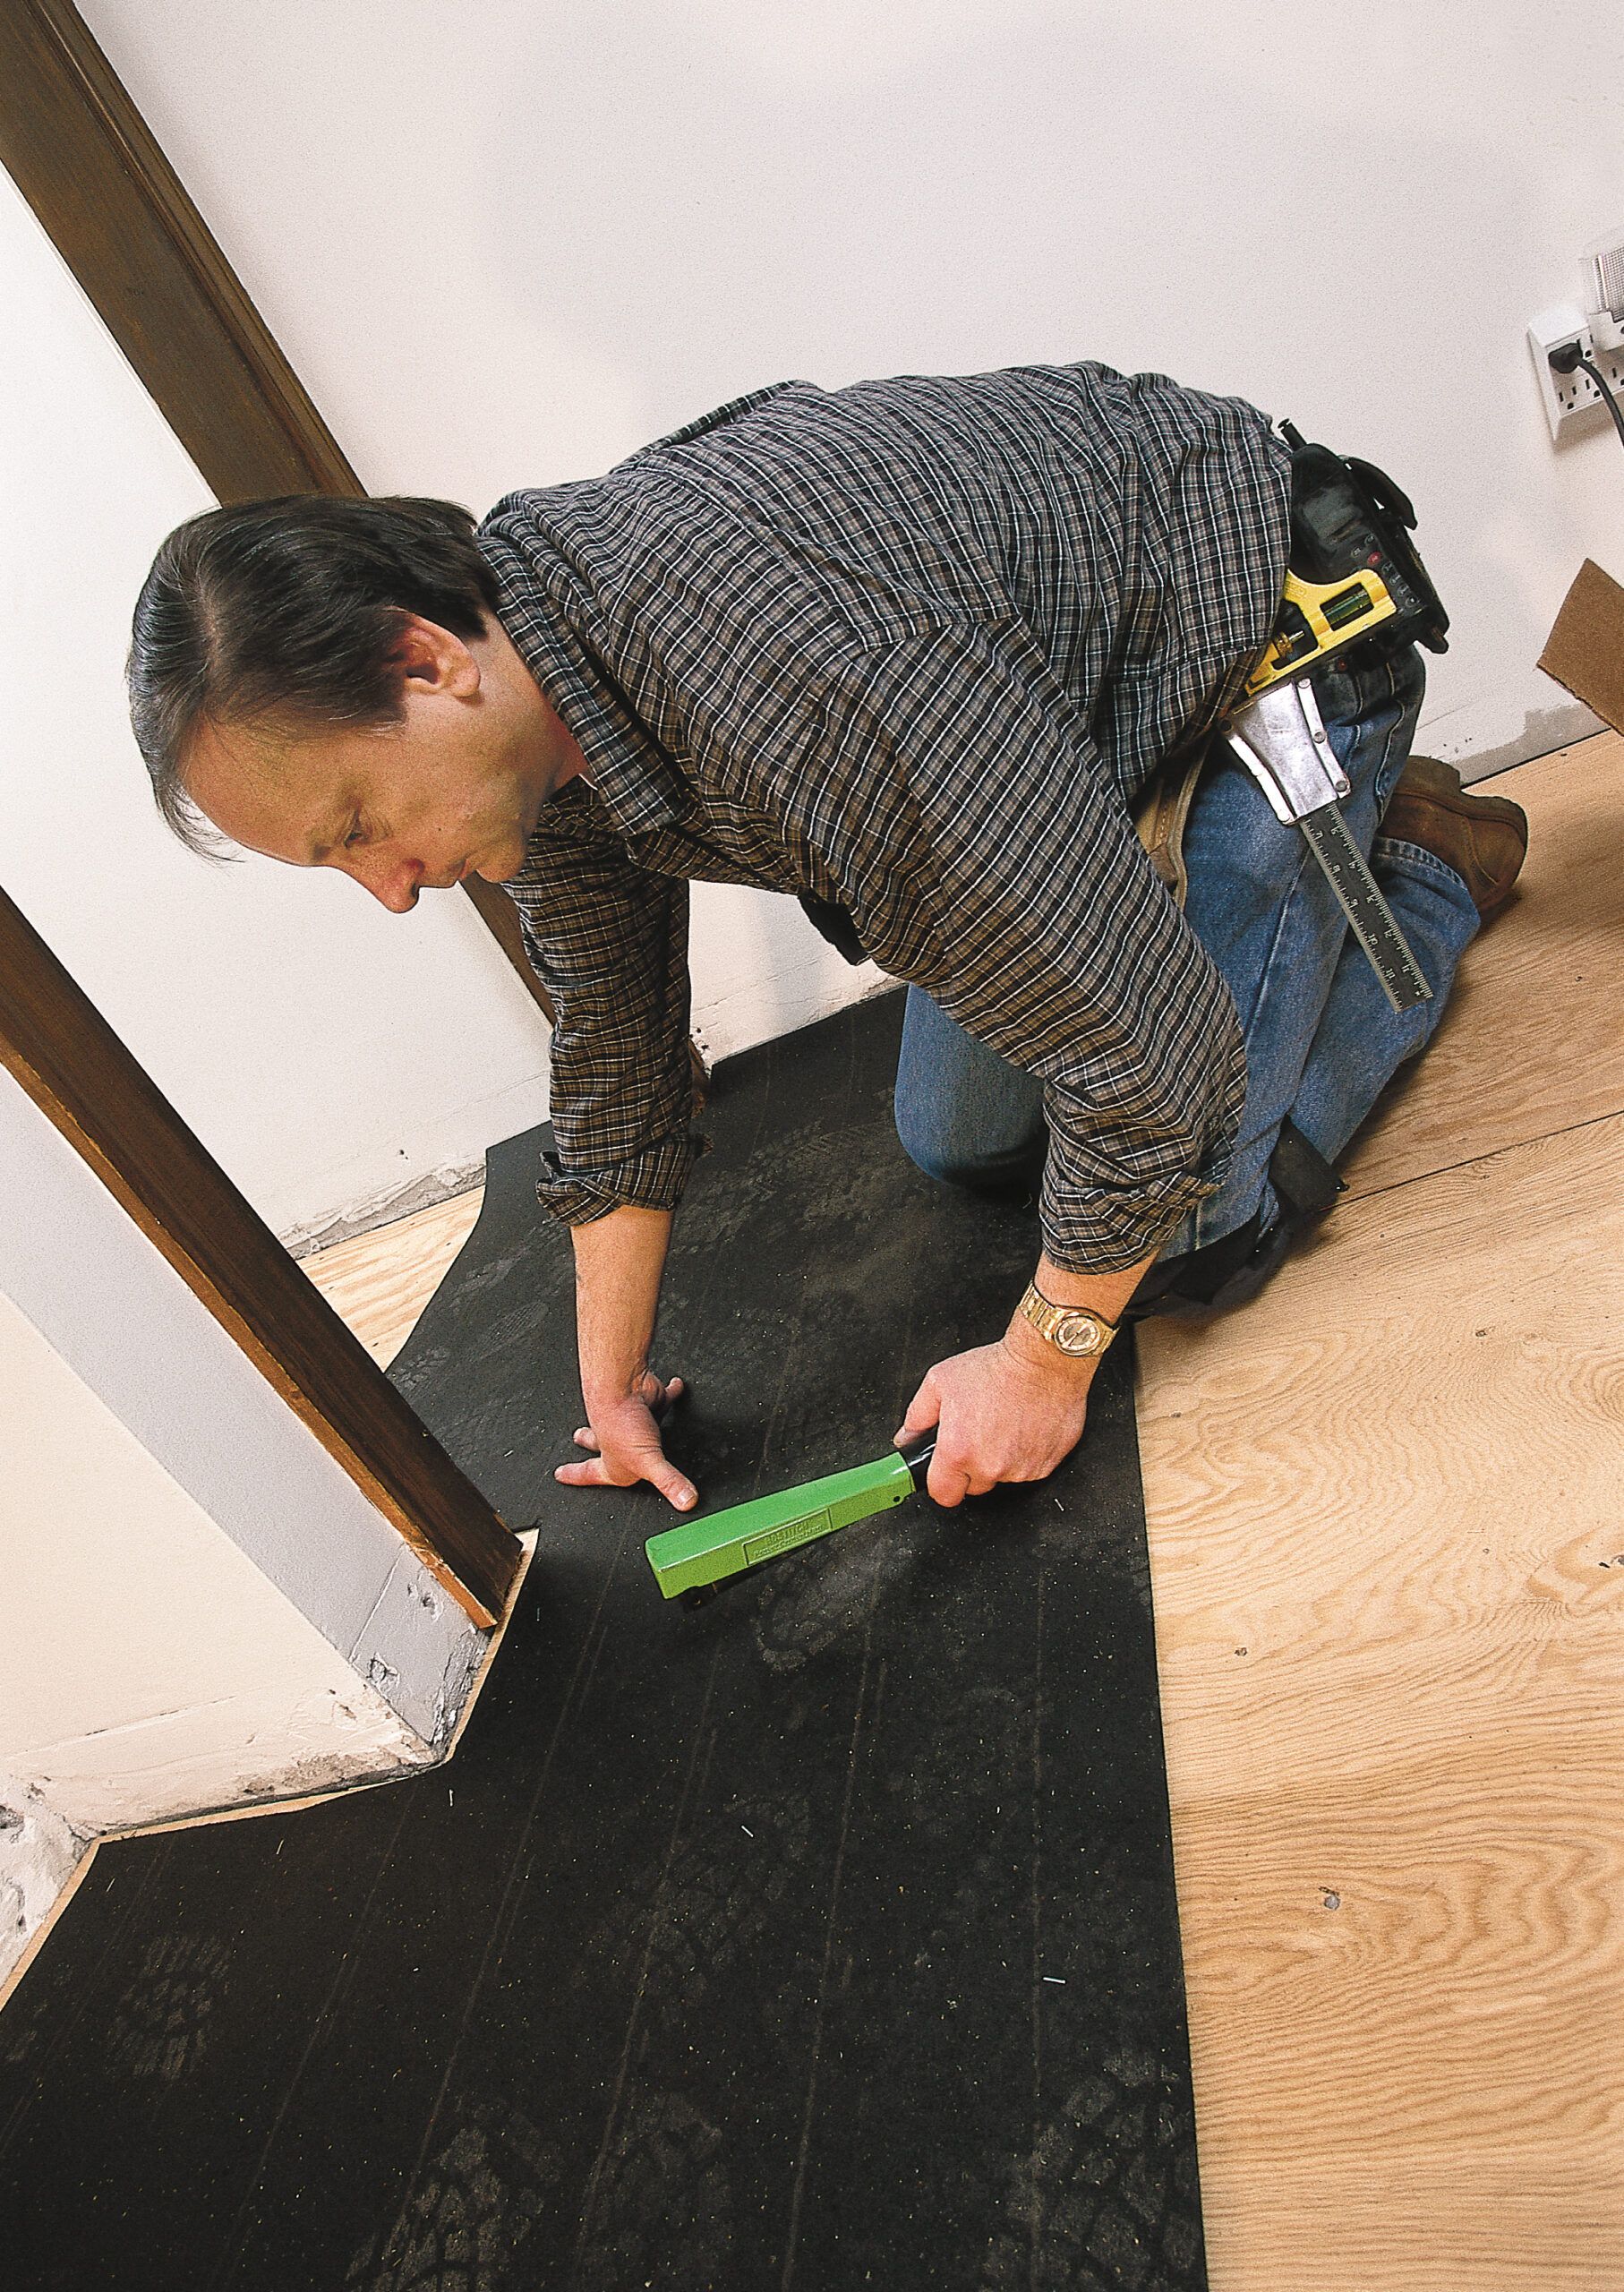
Laying the Underlayment
Laying underlayment helps to provide a smoother surface and to dampen sound. Here’s how to do it:
- Roll out the underlayment in the same direction as your planned flooring layout. We recommend installing them parallel to the longest wall in the room. While this doesn’t affect installation quality, it generally looks better and makes the room feel bigger.
- Butt the edges together without overlapping and secure with tape if necessary.
- Trim the underlayment to within 1/2-inch of the walls using a utility knife.
“Cover the subfloor with 15-pound builder’s felt and run it in the same direction as the new flooring,” says Hosking.
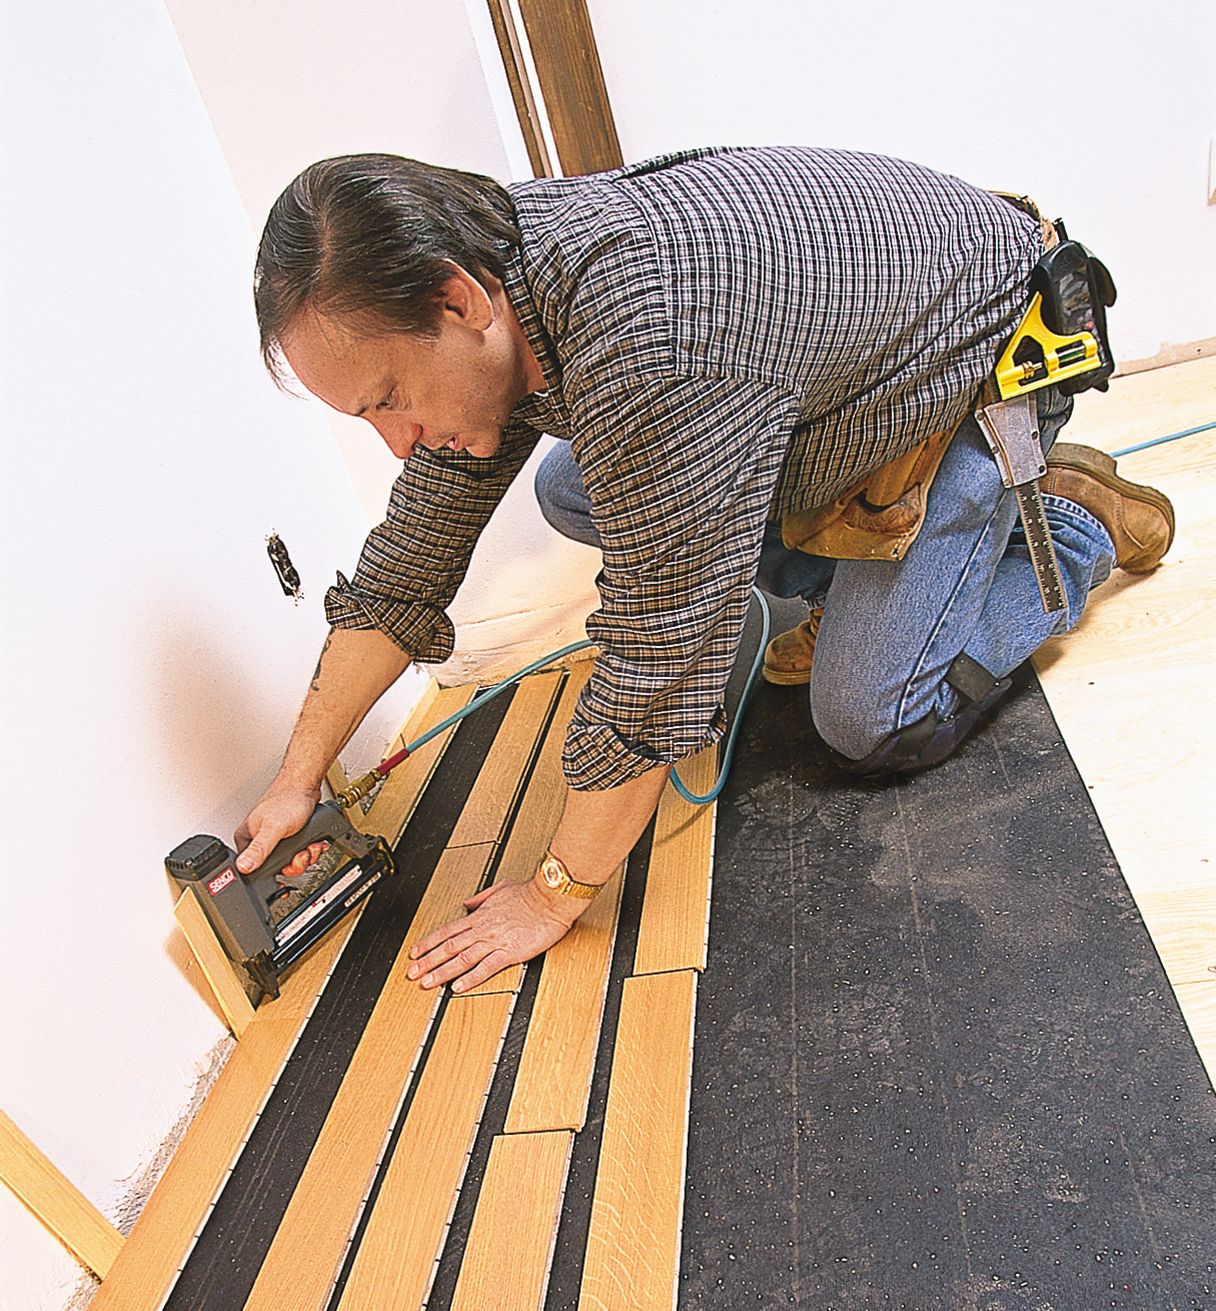
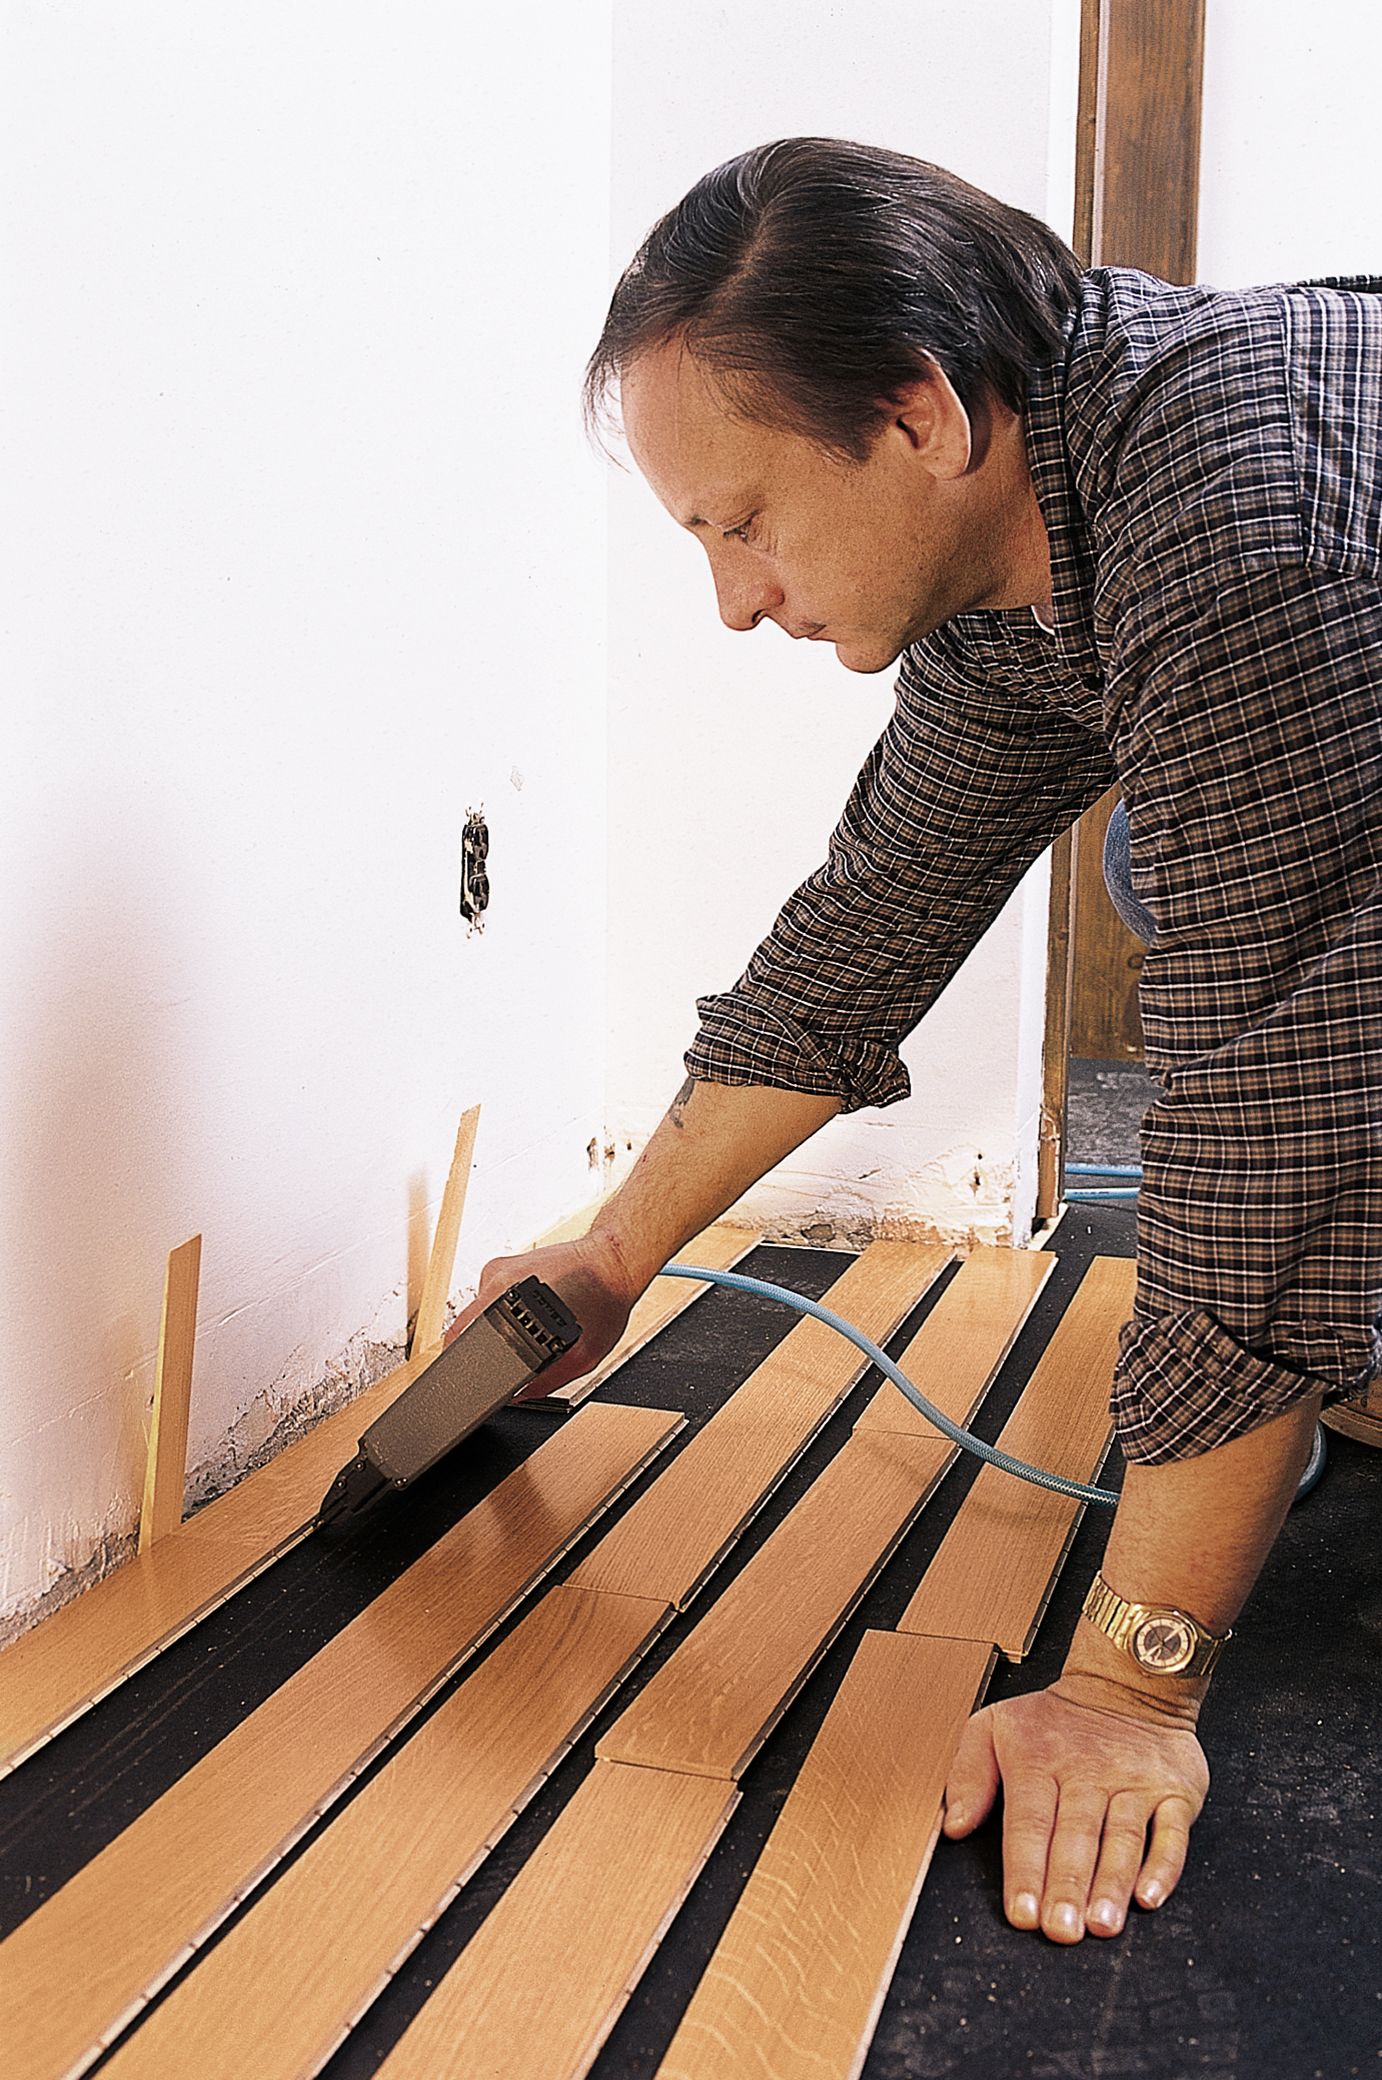
Installing the First Row
Take your time installing your first row as it sets the tone for the entire installation. Here’s how to lay the first row:
- Start in a corner, placing 1/2-inch spacers against the walls to allow for expansion.
- Lay the first plank with the groove side facing the wall.
- Continue laying planks, connecting them at the short ends.
- Cut the last plank in the row to fit, ensuring at least a 1/2-inch wall gap.
“Start laying the floor in a corner, along the longest exterior wall, which is more likely than a partition wall to be straight and square,” says Hosking.
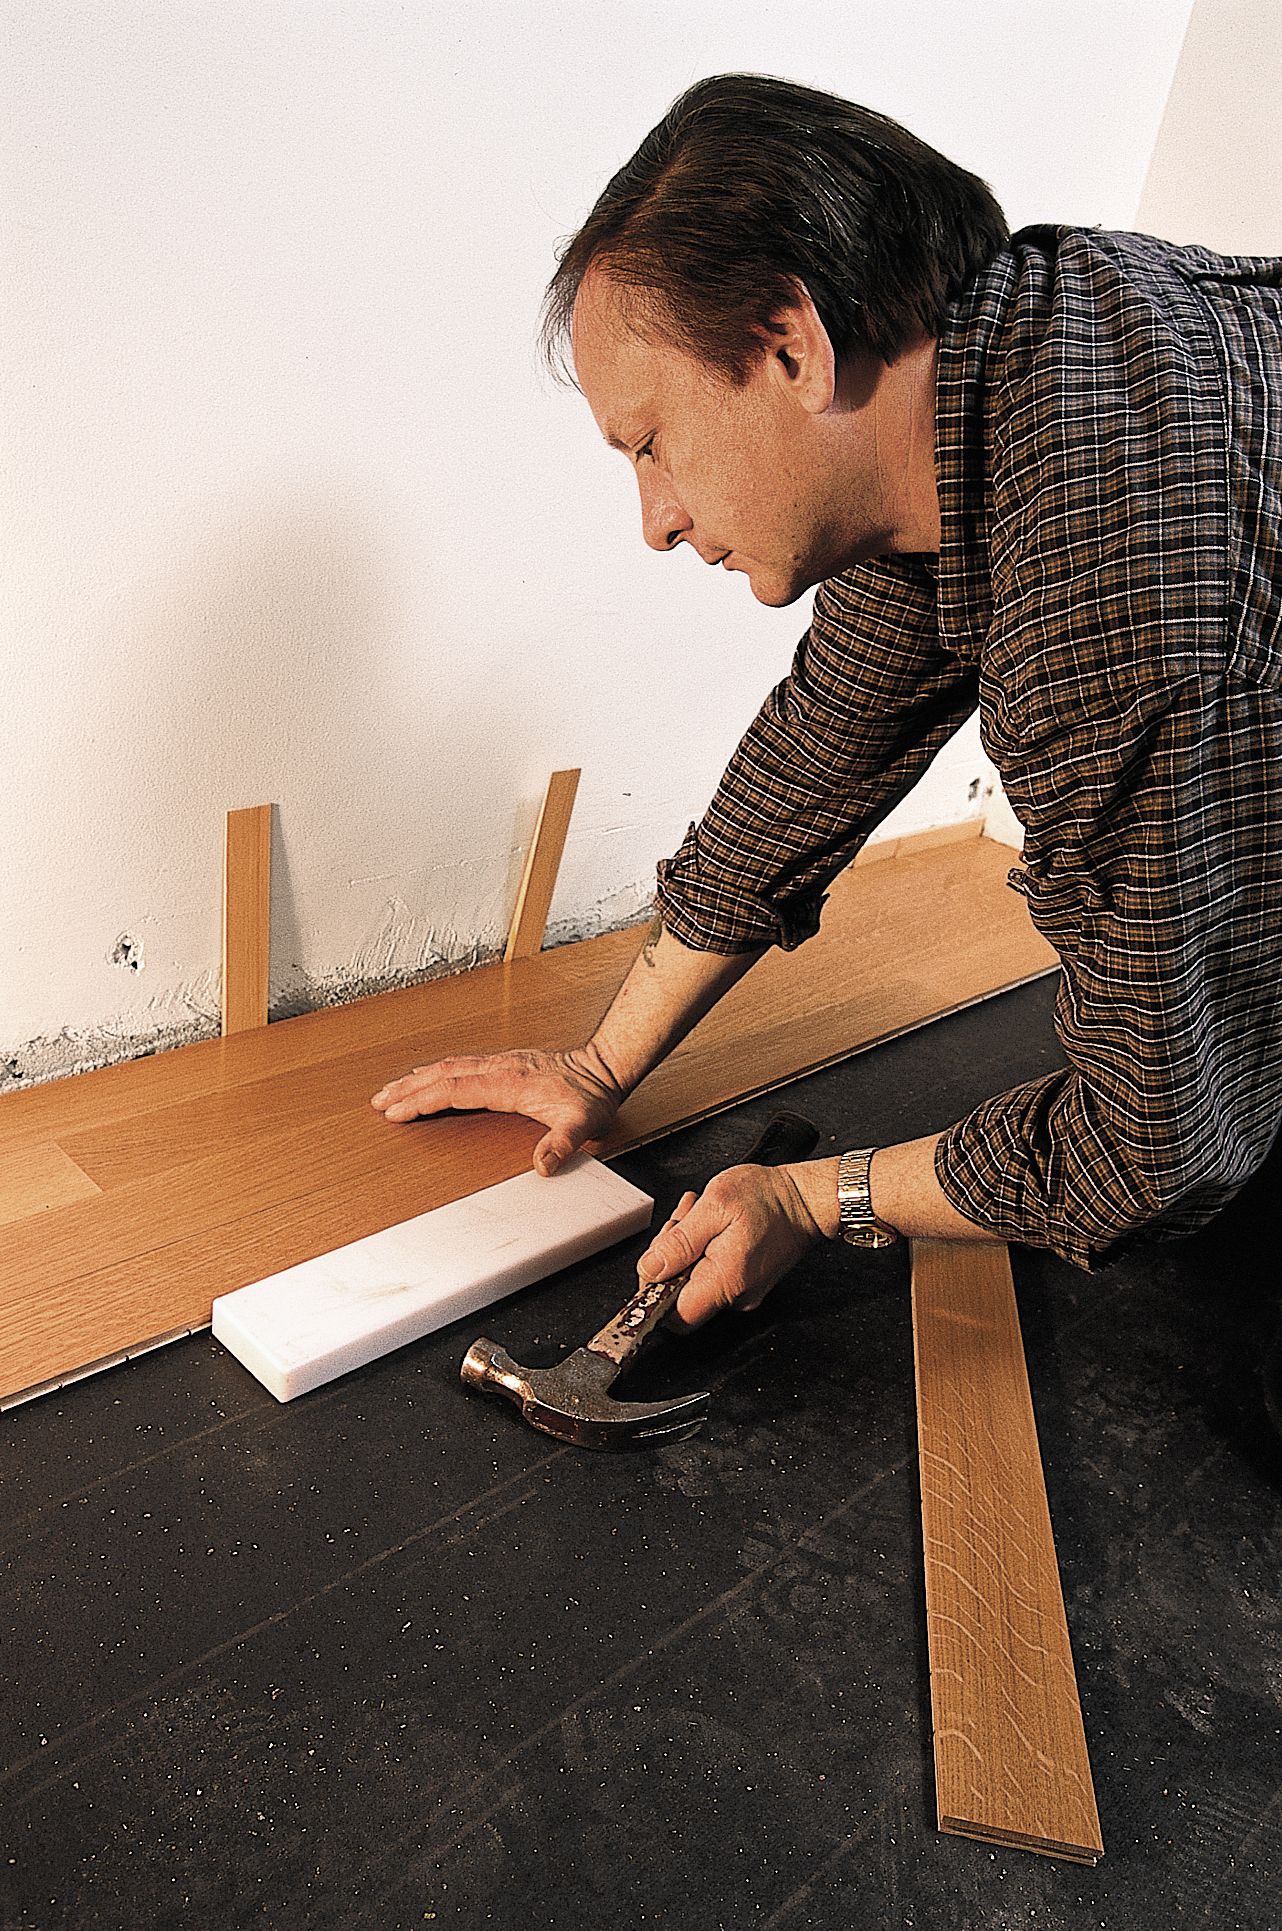
Continuing the Installation
Continue installing the planks row by row. Follow these steps to maintain accuracy and consistency:
- Begin the second row with a cut plank to stagger the end joints.
- Insert the tongue of the new plank into the groove of the first row at a slight angle.
- Press down to lock the planks together.
- Use a tapping block and hammer to ensure tight seams between planks.
- Continue this process, staggering end joints by at least 12 inches between rows.
Fitting Around Obstacles
Certain obstacles may require customized cuts. Here’s how to fit planks around obstacles accurately:
- Measure and mark planks to fit around obstacles such as doorways, pipes, or vents.
- Use a jigsaw to cut the planks as needed.
- Allow for expansion gaps around all fixed objects.
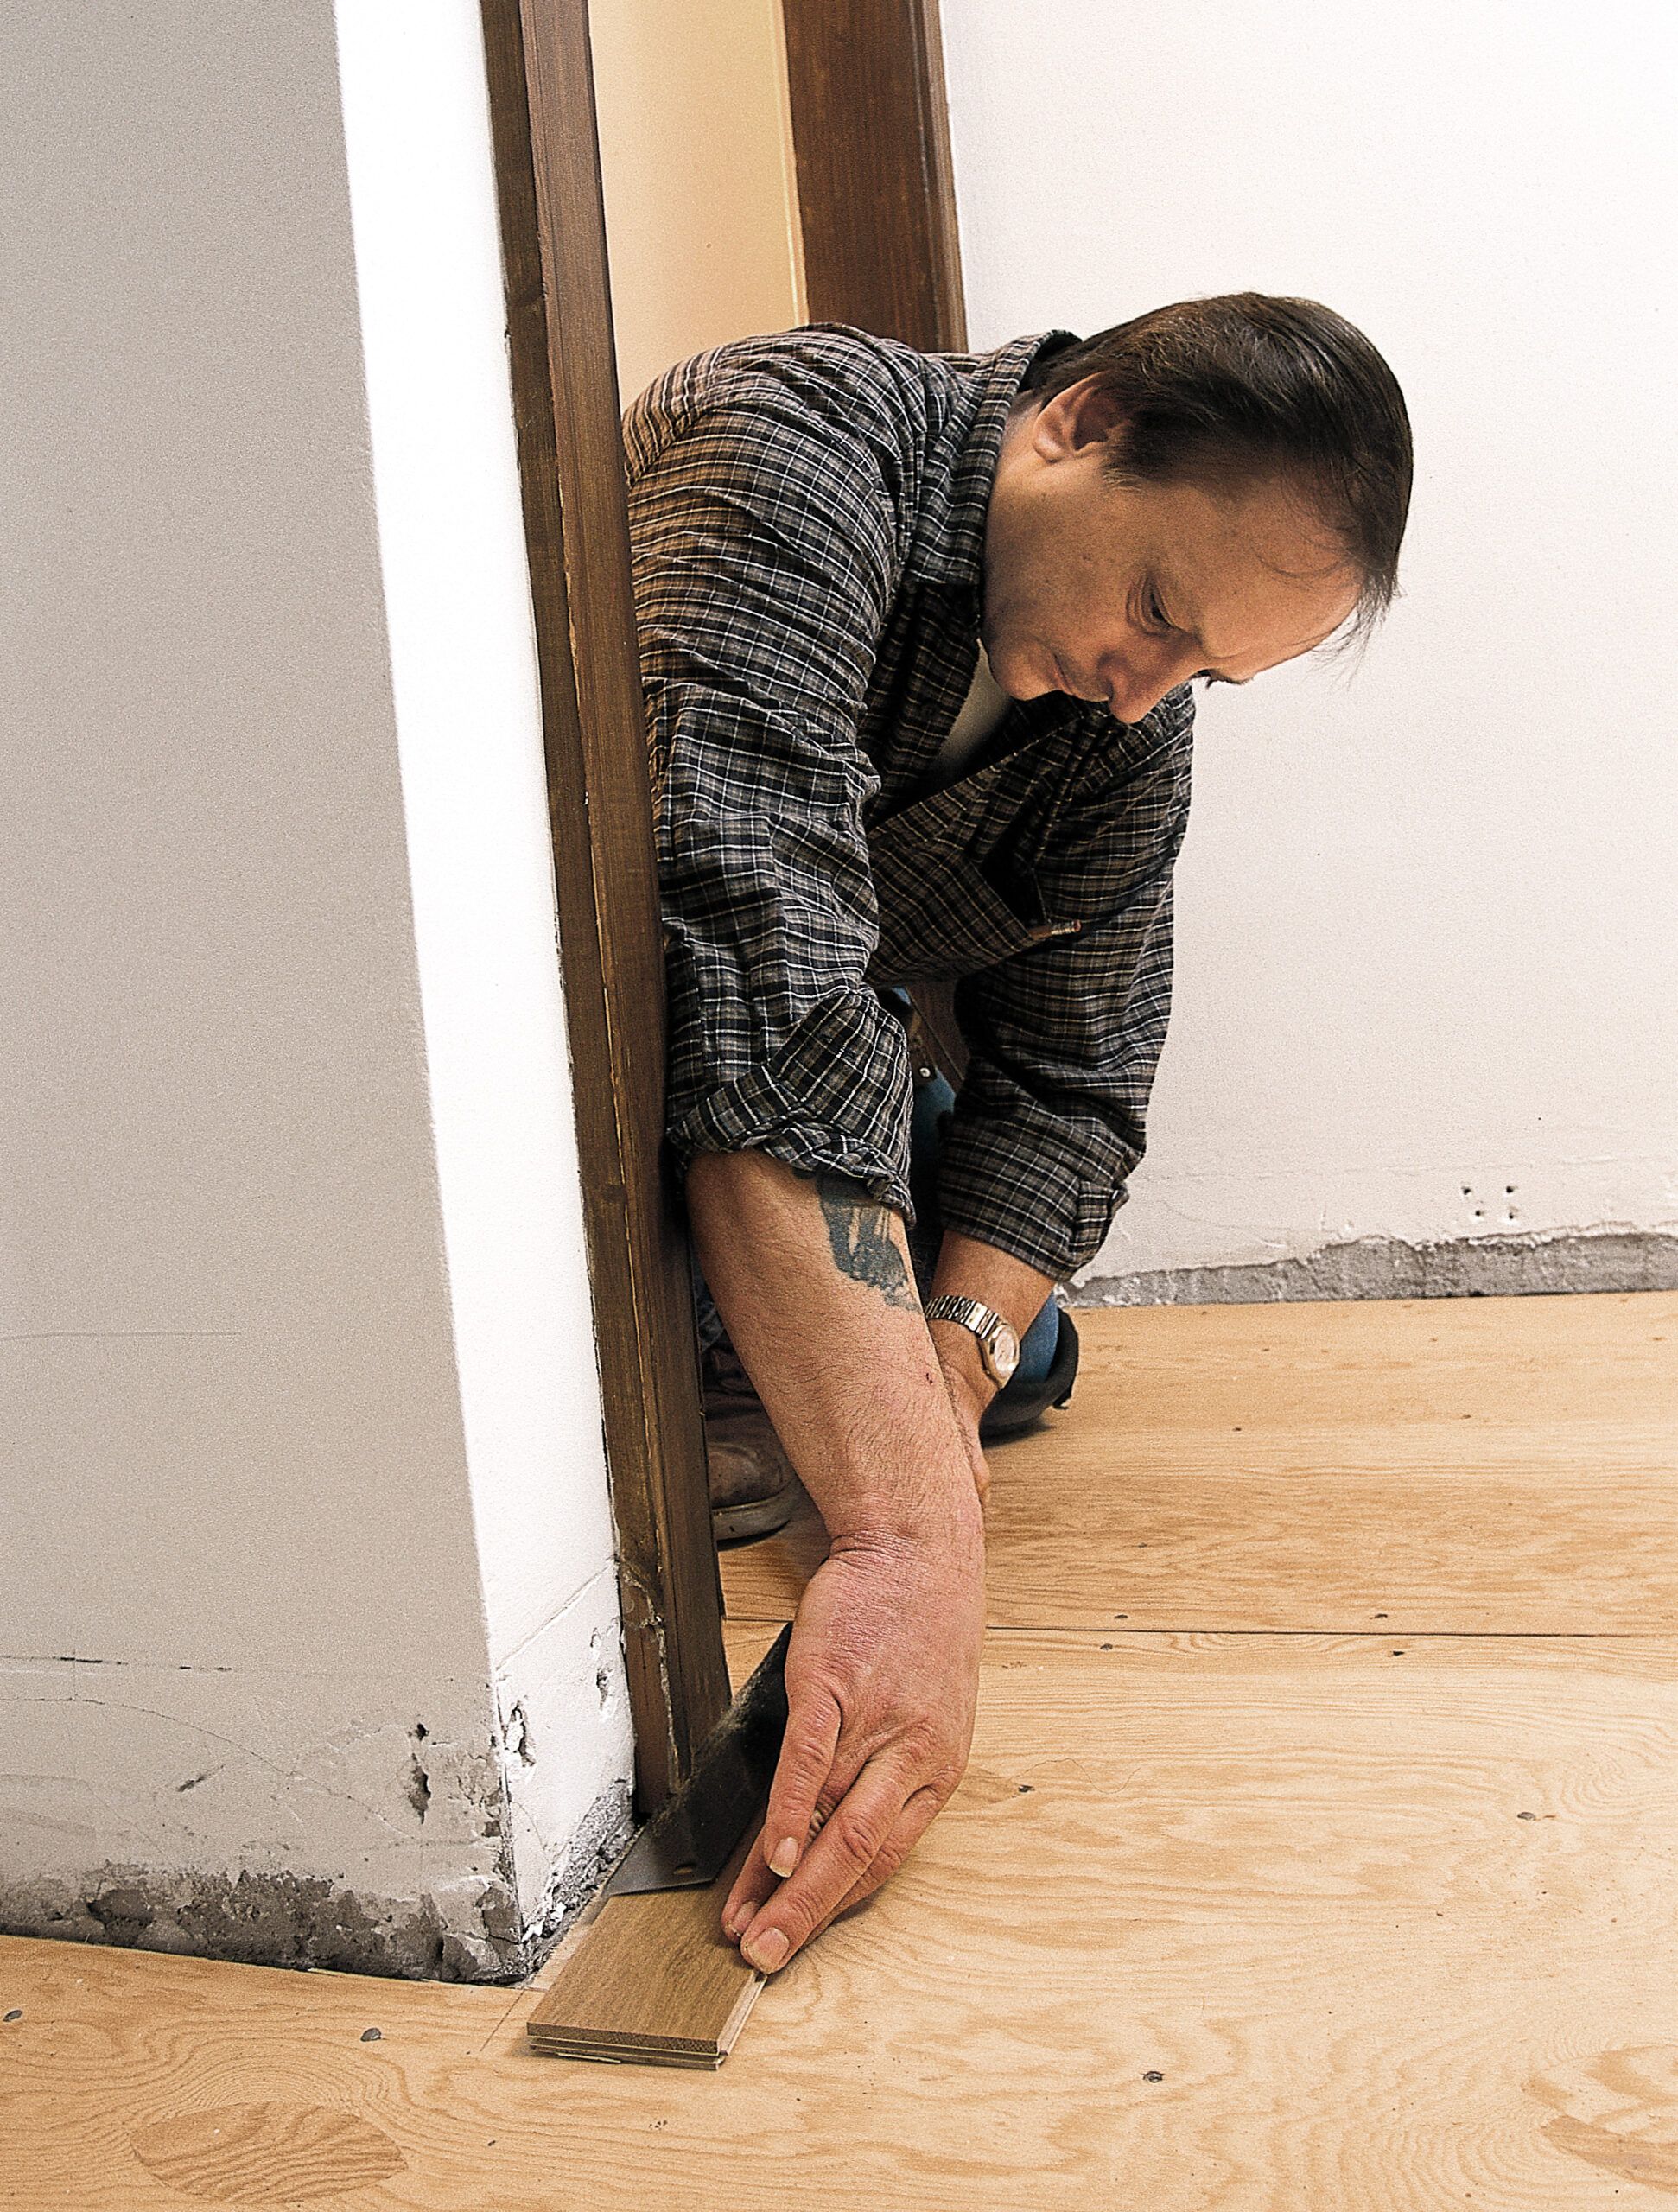
Handling Door Casings and Transitions
Proper treatment of door casings and transitions is important for a polished, professional-looking installation. These areas require special attention to ensure a seamless integration with your newly engineered wood flooring.
Trimming Door Casings
Trimming door casings allows the flooring to slip underneath, creating a clean, finished look.
- Place a scrap piece of flooring next to the door casing.
- Lay a handsaw flat on the scrap piece.
- Carefully saw through the casing, using the flooring as a guide for height.
- Remove the cut piece and clean up any debris.
Installing Transition Strips
Transition strips are where your new flooring meets other flooring types or thresholds.
- Measure the doorway or transition area accurately.
- Cut the transition strip to length using a miter saw.
- Install any required track or base for the transition strip.
- Snap or screw the transition strip into place, ensuring it’s secure and level.
Properly installed door casings and transitions help blend different flooring types seamlessly, giving your home a more cohesive look.
Finishing Touches
The final steps of your engineered wood flooring installation require installing the last row and adding baseboards and trim. These finishing touches give your new floor a polished, professional appearance.
Installing the Last Row
Finish the job by neatly installing the last row of planks.
- Measure the width needed for the last row, accounting for the 1/2-inch expansion gap.
- If necessary, cut the planks lengthwise to fit.
- Use a pull bar to snug the last row tightly against the previous row.
- If using the floating method, do not nail or glue the last row to the subfloor.
Adding Baseboards and Trim
Adding baseboards and trim hides the expansion gaps and gives a finished appearance.
- Remove all spacers from around the room’s perimeter.
- Install baseboards to cover the expansion gap, nailing them to the wall, not the floor.
- Add any necessary quarter-round or shoe molding for a finished look.
- Fill any visible nail holes with wood putty that matches your flooring color.
Troubleshooting Common Issues
Even with careful installation and maintenance, you may encounter some issues with your engineered wood flooring over time. Here are some common problems and how to address them.
Addressing Gaps and Buckling
Gaps between planks or buckling can occur due to changes in humidity or improper installation. For small gaps, use wood filler that matches your floor color. You may need to remove and reinstall affected planks for significant buckling, ensuring proper expansion gaps. Maintain consistent indoor humidity to prevent future issues.
Fixing Squeaks and Creaks
Squeaky floors can be annoying but often easily fixed. First, locate the source of the squeak by walking on the floor. For floating floors, try sprinkling talcum powder between the planks to reduce friction. For nail-down installations, drive additional nails into the subfloor through the planks in problem areas.
Maintenance and Care
Proper maintenance helps extend the beauty and longevity of your engineered wood floors.
Daily Cleaning Tips
- Clean up spills immediately to prevent staining or water damage.
- Sweep or vacuum regularly to remove dirt and debris.
- Use a slightly damp mop for deeper cleaning, avoiding excess water. If using a cleaning solution, only use those that specifically say they’re designed for engineered wood.
- Use felt pads under furniture legs to prevent scratches.
Long-Term Preservation Strategies
- Avoid using harsh chemicals or steam cleaners on your engineered wood floors.
- Consider professional refinishing every five to 10 years, depending on wear and tear.
- Maintain consistent indoor humidity levels (30%–50%) to prevent wood expansion or contraction.
- Use area rugs in high-traffic zones to reduce wear.
Additional Tips for Long-Lasting Wood Floors
- Keep pet nails trimmed to minimize scratches.
- Rotate rugs periodically to avoid uneven fading.
- Use a soft-bristle vacuum attachment to prevent damage.
Our Conclusion
Engineered wood floors are highly durable and long-lasting if installed properly. In many cases, they’re cheaper than authentic hardwood yet look just as nice. If you’re unsure about any aspect of the installation process, consider hiring a flooring professional. Prioritize safety while using tools, and wear protective knee pads to keep from injuring yourself.
Next Up In Flooring
- How To Install a Herringbone Floor
- How To Stretch Carpet
- How To Patch a Carpet
- Are Asbestos Floor Tiles Safe To Remove?
- How To Clean Laminate Floors
- Terrazzo Floors: A Comprehensive Guide
